


Resolution of your artwork is a critical factor in DTF printing. It directly affects the quality of your print. Low resolution means blurry or faded output. High resolution means sharp, clear, and high-definition output. DPI and PPI are two resolution measurements when it comes to preparing artwork for DTF printing.
PPI (Pixels Per Inch) refers to the pixel density of your digital image on screen, while DPI (Dots Per Inch) refers to how densely the printer places ink dots during printing. Both work together to determine print clarity, sharpness, and detail accuracy. If your artwork has low PPI, increasing printer DPI alone won’t improve quality.
The missing detail simply doesn’t exist in the file. That’s why understanding resolution settings is essential before sending artwork for printing. Proper image sizing, pixel dimensions, and DPI settings ensure cleaner edges, smoother gradients, and professional-quality DTF transfers.
What is DPI and Why It Matters
If you’ve ever searched “what is DPI resolution?”, the simple answer is this: DPI stands for Dots Per Inch. It measures how many ink dots a printer places within one inch of a printed design. In DTF printing, DPI directly impacts sharpness, detail, edge clarity, and overall print quality.
Higher DPI allows the printer to reproduce smoother gradients, cleaner lines, and more detailed artwork. Lower DPI can result in jagged edges, blurry text, and faded-looking prints. However, DPI alone does not guarantee quality. Your artwork resolution also matters. A printer cannot create missing detail if the original file is low quality.
For most DTF transfers, 300 DPI at final print size is considered the ideal standard. It provides a balance between file size and print clarity. This is especially important for logos, small text, gradients, and high-detail graphics where every pixel matters.
In short, proper DPI settings help ensure your transfers look professional, sharp, and production-ready.
Related: DTF Transfer Resolution Guide: Ideal DPI & Image Size for Perfect Prints
What is PPI and Why It Matters
If you’re wondering “what is PPI resolution?”, PPI stands for Pixels Per Inch. It measures how many pixels are packed into one inch of a digital image. In simple terms, PPI controls the detail and clarity of your artwork before it ever reaches the printer.
Many people ask, “Is PPI and DPI the same?” Not exactly. PPI relates to the digital image itself, while DPI refers to how the printer places ink dots on the transfer film. They work together, but they are not identical measurements.
In DTF printing, low PPI artwork means fewer image details. Even with a high-end printer, the output can still appear blurry or pixelated if the original file lacks enough pixels. High PPI artwork produces cleaner edges, smoother gradients, sharper text, and better image clarity.
For professional-quality DTF transfers, artwork is commonly prepared at 300 PPI at the final print size. This helps maintain sharp detail and ensures the printer has enough image information to reproduce the design accurately.
DPI vs PPI: How They Differ?
The confusion around DPI vs PPI is extremely common in printing. Many people use the terms interchangeably. Some software even treats them similarly. But technically, they are not the same thing. Understanding the difference between DPI and PPI is important if you want sharper DTF transfers, better print clarity, and properly prepared artwork.
At a basic level, PPI belongs to the digital world. DPI belongs to the printing world. One controls image detail. The other controls how ink is physically printed. Both work together, but they perform very different jobs.
If you misunderstand one of them, your final print quality suffers. That’s why knowing the difference between PPI and DPI matters so much in apparel printing, graphic design, photography, and DTF production workflows.
Why People Confuse DPI and PPI
The confusion exists because many design programs casually use DPI when discussing image resolution. For years, software interfaces simplified terminology, causing designers and printers to mix the terms together.
In reality:
-
Screens display pixels
-
Printers spray dots
That’s the technical distinction.
Still, in everyday conversation, many people say “300 DPI artwork” even though they actually mean 300 PPI artwork. This happens constantly in DTF printing.
Why PPI Matters More During Artwork Preparation
Before printing begins, PPI is the more important factor. Why? Because it determines how much detail your file actually contains. You need extra care for gang sheet printing since multiple images are involved.
A low-resolution image may look acceptable on a phone screen. But once enlarged for printing, flaws become obvious:
-
Blurry edges
-
Jagged lines
-
Pixelation
-
Soft text
-
Poor gradients
For example:
A logo designed at:
-
800 × 800 pixels
might look decent on Instagram.
But if you stretch it across a 12-inch shirt print, the effective PPI drops dramatically.
That’s when quality problems begin.
Professional DTF workflows typically require:
-
300 PPI at final print size
-
High-resolution PNGs
-
Vector artwork when possible
This ensures the printer receives enough image detail to reproduce sharp transfers.
Related: How to Prepare Image for DTF Printing? An Expert’s Guide
Why DPI Matters During Printing
Once the artwork is ready, DPI becomes important. The printer now determines how accurately it can reproduce the image physically onto film.
Higher DPI printing helps with:
-
Smooth gradients
-
Small text
-
Tiny details
-
Skin tones
-
Fine lines
-
Photo-quality transfers
For example:
A DTF printer running at:
-
720 DPI prints faster
-
1440 DPI prints smoother
-
2880 DPI delivers ultra-fine detail
But higher DPI also slows production speed.
That’s why print shops balance:
-
Print quality
-
Ink usage
-
Production efficiency
The highest DPI is not always necessary.
Real-World Example: How PPI and DPI Work Together
Imagine printing a 10-inch-wide graphic.
Scenario 1: Poor Artwork
Image size:
-
1000 pixels wide
Effective PPI:
-
100 PPI
Even with a high-end printer running at 1440 DPI:
Result:
-
Blurry edges
-
Soft details
-
Pixelation
Why? Because the file itself lacks enough information.
Scenario 2: Proper Artwork
Image size:
-
3000 pixels wide
Effective PPI:
-
300 PPI
Printer setting:
-
1440 DPI
Result:
-
Sharp details
-
Smooth gradients
-
Professional-quality transfer
This is the perfect example of the difference between DPI and PPI in real production.
Is Higher DPI Always Better?
Not necessarily.
Many people assume maximum DPI automatically means maximum quality. That’s not always true.
At extremely high DPI:
-
Printing becomes slower
-
Ink usage increases
-
File processing takes longer
-
Production efficiency drops
For most DTF applications:
-
1440 DPI is excellent
-
2880 DPI is premium-level
-
720 DPI works for basic production
The better strategy is balancing:
-
Artwork quality
-
Printer capability
-
Production speed
Related: What is the Best File Type for DTF Printing?
Common Mistakes People Make
One of the biggest reasons DTF prints lose sharpness is not the printer—it’s the artwork preparation. Many print issues begin long before the transfer reaches the heat press. Poor file handling, incorrect sizing, and misunderstanding resolution settings can instantly reduce print quality, even when using premium equipment. Understanding these mistakes helps you avoid blurry prints, pixelation, and wasted transfers.
Using Low-Resolution Screenshots
This is one of the most common mistakes in DTF printing. Screenshots taken from social media, websites, or messaging apps usually contain very low resolution. They may look acceptable on a phone screen, but once printed, the flaws become obvious.
Low-resolution screenshots often lead to:
-
Pixelated edges
-
Blurry text
-
Poor gradients
-
Soft-looking graphics
Most screenshots simply do not contain enough PPI for professional printing.
Enlarging Small Images
Scaling up small artwork is another major problem. When a small image is enlarged beyond its original dimensions, the software stretches existing pixels instead of creating new detail.
This reduces effective PPI and causes:
-
Jagged edges
-
Distorted graphics
-
Loss of sharpness
-
Fuzzy outlines
For example, a logo designed for a website banner may not work for a full-size T-shirt print. Artwork should always be created at the final print size from the beginning.
Confusing DPI with Image Quality
Many people assume increasing printer DPI can fix poor artwork. It cannot.
Printer DPI controls how ink dots are placed during printing, but it does not add missing image detail. If the original artwork is low quality, even the best printer will reproduce those flaws accurately.
This misunderstanding often leads to:
-
Wasted film and ink
-
Poor print output
-
Misaligned quality expectations
Good printing starts with good artwork—not just high printer settings.
Exporting Compressed PNG Files
Heavy compression damages image clarity. Some export settings reduce file size aggressively, which removes fine detail and creates visible artifacts.
Compressed files can cause:
-
Washed-out gradients
-
Broken edges
-
Color banding
-
Loss of fine detail
Always export artwork using high-quality settings with minimal compression.
Ignoring Final Print Dimensions
A design prepared for a small print area may fail completely when enlarged for apparel printing. Resolution must always match the actual print dimensions.
Before exporting artwork:
-
Set the correct canvas size
-
Design at final print dimensions
-
Maintain 300 PPI at actual size
-
Avoid resizing after export
This simple step prevents most DTF print quality problems before production even begins.
Best Practices for DTF Printing
Achieving professional DTF printing results requires proper artwork preparation, optimized print settings, and a clear understanding of DPI vs PPI. Many beginners confuse DPI versus pixels per inch, but knowing the distinction is essential for creating sharp, production-ready transfers. While PPI refers to the resolution of digital artwork, DPI refers to the printer’s output capability. Understanding dots per inch vs pixels per inch helps improve print clarity, color accuracy, and transfer durability.
The difference between DPI and PPI is that PPI controls image quality on the digital side, while DPI controls how precisely the printer applies ink during production.
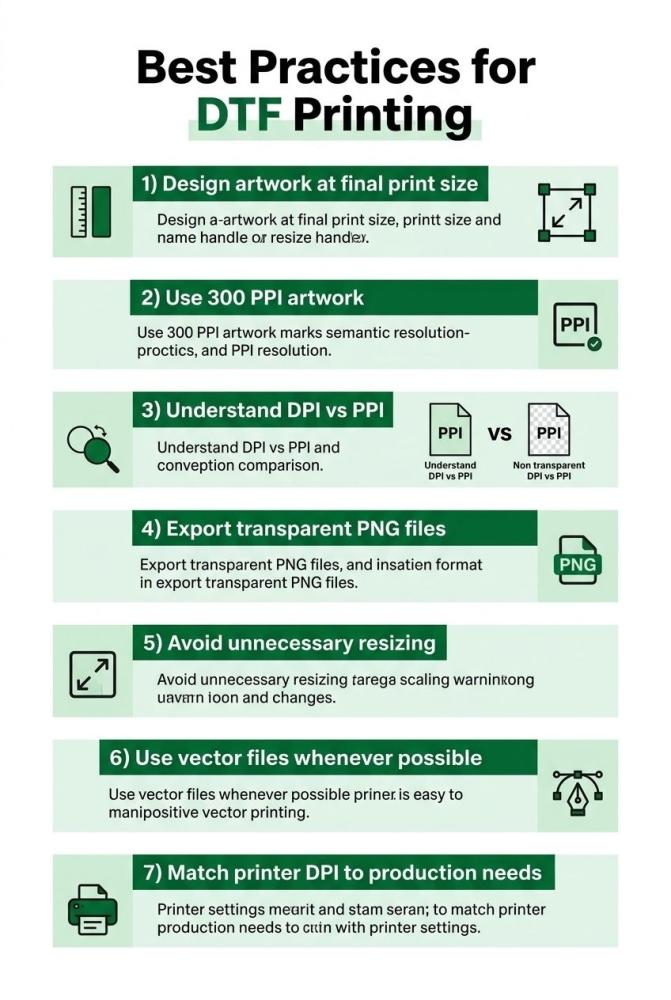
Key Best Practices for DTF Printing
-
Design artwork at the final print size
Enlarging smaller artwork later can reduce quality and create blurry or pixelated prints. -
Use 300 PPI artwork
High-resolution files preserve sharp details, smooth gradients, and crisp edges. -
Understand DPI vs PPI
PPI affects digital image quality, while DPI determines printer output precision. Both work together to create clean DTF transfers. -
Export transparent PNG files
Transparent backgrounds prevent unwanted white borders and background artifacts around the design. -
Avoid unnecessary resizing
Repeated scaling reduces effective resolution and can distort the artwork. -
Use vector files whenever possible
Vector graphics maintain sharpness at any size and are ideal for logos, typography, and line art. -
Match printer DPI to production needs
Higher DPI settings improve detail and gradient smoothness, while lower DPI may increase printing speed.
Additional Tips for Better DTF Prints
-
Use premium DTF film and adhesive powder
-
Ensure proper curing before heat pressing
-
Maintain correct heat press temperature and pressure
-
Store materials in a low-humidity environment
-
Run test prints before bulk production
For businesses handling large production volumes, maintaining proper artwork resolution and optimized printer settings is critical for consistent quality. Professional bulk wholesale printing services help ensure reliable output, accurate colors, and scalable production efficiency.
Why These Practices Matter
Following these best practices helps:
-
Improve print sharpness and color accuracy
-
Reduce peeling, cracking, and adhesion problems
-
Maintain consistency across production runs
-
Increase garment durability after washing
-
Create clean, vibrant, and professional DTF transfers
Using the right combination of high-resolution artwork, proper file formats, and optimized printer settings ensures high-quality DTF printing results suitable for commercial production.
Related: What Makes a Good DTF Transfer: A Complete DTF Printing Quality Checklist
Final Thoughts on DPI vs PPI
Many DTF print problems start long before printing begins. Poor artwork preparation is often the real issue. Using low-resolution screenshots, enlarging small graphics, or exporting compressed PNG files can instantly reduce print clarity.
Even the best printer cannot fix missing image detail. That’s where many people misunderstand DPI and image quality. High printer DPI improves ink placement, but it does not repair blurry artwork. Another common mistake is ignoring final print dimensions.
A design that looks sharp on screen may appear pixelated when enlarged for apparel printing. To avoid weak transfers, always prepare artwork at the final print size, maintain 300 PPI resolution, and export high-quality files with minimal compression.
FAQs
What is the best resolution for DTF printing?
For most professional DTF transfers, 300 PPI at the final print size is considered the ideal resolution. It helps produce sharp details, smooth gradients, and clean edges.
Can I use screenshots for DTF printing?
Screenshots are usually too low in resolution for high-quality printing. They often become blurry or pixelated when enlarged onto garments.
Is DPI the same as PPI in DTF printing?
No. PPI refers to the pixel density of the artwork, while DPI refers to how the printer places ink dots during printing. Both affect print quality differently.
Why does my DTF print look blurry even at high DPI?
High printer DPI cannot fix poor artwork quality. Blurry prints usually happen because the original image has low resolution or incorrect sizing.
What file format works best for DTF artwork?
PNG files with transparent backgrounds are commonly preferred for DTF printing because they preserve image quality and support clean artwork edges.