
October 6, 2026 · Connor McDonnell
How to Price Custom Apparel Using Bulk DTF Transfers
The simplest way to price custom apparel with bulk DTF transfers is to calculate the full cost of one finished item, then add the profit margin your business needs. Your full cost should include the blank garment, DTF transfer, pressing labor, packaging, payment fees, shipping, design time, and a share of business overhead.
Do not price a shirt by adding a small markup to the transfer alone. The transfer is only one part of the product. A shirt can appear profitable until you account for your time, supplies, mistakes, and selling costs. A complete cost calculation gives you a price that supports the business instead of only covering the most visible expenses.
This guide explains DTF transfer pricing in plain English. You will learn how to price DTF shirts, calculate a DTF transfer price per shirt, set prices for bulk orders, choose a DTF transfer profit margin, and adjust your pricing when customers want more colors, larger designs, rush service, or special packaging.
Quick Answer: How to Price DTF Shirts
Use this formula:
Total cost per item + profit = selling price
To calculate total cost per item, add the blank garment, transfer, pressing labor, packaging, payment fees, shipping allocation, design or setup time, and overhead allocation. Then choose a target profit margin and use a margin-based formula instead of simply doubling the cost.
For example, if the complete cost of one finished shirt is $12 and you want a 40% profit margin, the selling price is $12 ÷ (1 − 0.40), or $20. The $8 difference is not all free cash. It must support the profit goal after the listed costs have been paid.
Your final price should also fit your market, garment quality, design size, order quantity, and customer experience. A formula protects your numbers, while market research helps you choose a price customers will accept.
Understand Cost, Markup, and Profit Margin
Cost is what you spend to make and sell the item. Markup is the amount added to cost. Profit margin is the percentage of the selling price that remains after the cost is paid. These terms are related, but they are not interchangeable.
If a shirt costs $10 and you add a 50% markup, the price is $15. Your profit is $5, which equals a 33.3% margin on the selling price. If you want a 50% profit margin, the price is $10 ÷ (1 − 0.50), or $20.
Many pricing mistakes happen because a business says it wants a 50% margin but uses a 50% markup calculation. Decide which number you are using before you publish prices or quote a customer.
The Difference Between Markup and Margin
|
Term |
Meaning |
Example with $10 cost |
|
Markup |
Amount added to cost. |
$10 + 50% markup = $15 price. |
|
Profit margin |
Profit as a percentage of selling price. |
$10 cost at 50% margin = $20 price. |
|
Profit |
Money left after costs are paid. |
$20 price − $10 cost = $10 profit. |
List Every Cost Before Setting a Price
A reliable DTF transfer pricing model starts with a complete cost list. Write down the costs that change with each item and the costs that support the business over time. If you leave out a cost because it feels small, the total can still become meaningful across dozens or hundreds of shirts.
Your per-item cost may include:
- Blank shirt, hoodie, tote bag, or other garment.
- Bulk DTF transfer or the portion of a gang sheet used by the design.
- Heat press time and the labor required to prepare the garment.
- Packaging, labels, bags, inserts, and other fulfillment supplies.
- Payment processing, marketplace, or selling platform fees.
- Shipping materials and the portion of delivery cost you absorb.
- Artwork setup, resizing, or customer proofing time.
- A reasonable share of rent, software, equipment, utilities, and business administration.
You do not need to make the calculation complicated. You need to make it honest. Start with the costs you know, estimate the shared costs, and update the numbers as your business collects better records.
Calculate the DTF Transfer Price Per Shirt
The DTF transfer price per shirt depends on the design size, transfer quantity, sheet layout, shipping, and the number of shirts the order produces. If you buy a bulk gang sheet, divide the usable transfer cost by the number of finished designs, not simply by the number of artwork files.
Use this formula for a simple transfer cost:
Transfer cost per shirt = total transfer order cost ÷ number of usable transfers
If a gang sheet order costs $120 and contains 40 usable transfers, the transfer cost is $3 per transfer. If five designs are damaged or not usable, the real cost of each successful transfer is $120 ÷ 35, or about $3.43. This is why waste and quality checks belong in the pricing process.
If one design takes more space than another, do not assume every transfer has the same cost. A large back print may use much more sheet area than a small left-chest logo. Track the sizes separately when your product mix requires it.
Price Gang Sheets by Usable Output
Bulk buying can lower the average transfer cost, but only if the designs will actually be used. Unused pieces, incorrect sizes, and extra designs can make the real cost higher. Count the usable transfers and assign the cost to the products you expect to sell.
Include Shipping in the Transfer Cost
If you pay shipping to receive the transfers, divide that cost across the order or across the usable pieces. Do not hide it in a general expense if it clearly belongs to the transfer order. This gives you a more accurate DTF transfer price per shirt.
Account for Waste and Replacements
Set aside a small amount for test pieces, damaged transfers, misprints, and customer replacements. The percentage will depend on your workflow. Track the actual number over time and update your estimate instead of guessing forever.
Keep a Record for Each Order
Record transfer cost, quantity, shipping, usable pieces, and any waste. A short order log can show whether bulk purchasing is lowering your cost or simply creating extra inventory.
How to Price Custom Apparel Step by Step
When learning how to price custom apparel, use the same process for every product. Consistency makes it easier to compare shirts, hoodies, tote bags, and other items without forgetting an important cost.
Step 1: Choose the Garment Cost
Start with the actual cost of the blank garment. If you offer several garment qualities, create separate prices. A premium shirt should not be priced as if it were the least expensive blank in your catalog.
Step 2: Add the Transfer Cost
Use the DTF transfer price per shirt for the design location and size. A front-and-back order needs both transfers. A sleeve or pocket design may have a different cost from a large front print.
Step 3: Add Pressing Labor
Pay yourself or your team for the time required to inspect, position, press, peel, and check the garment. Labor is a real cost even when the owner is doing the work. If you ignore it, your price may only be paying for materials while your time remains unpaid.
Step 4: Add Packaging and Selling Fees
Include the bag, label, mailer, insert, payment fee, marketplace fee, and any other cost connected to the sale. A direct local sale may have fewer fees than an online marketplace order, so you may need separate price rules for each channel.
Step 5: Add Overhead
Overhead supports the business but may not belong to one specific shirt. Divide expected monthly overhead by the expected number of items sold to create a reasonable overhead amount per item. Use a conservative sales estimate so you do not spread the cost across more items than you are likely to sell.
Step 6: Add Your Target Profit
Choose a target margin based on your market, product quality, order size, and business goals. Use the margin formula when you want the profit to represent a specific percentage of the selling price.
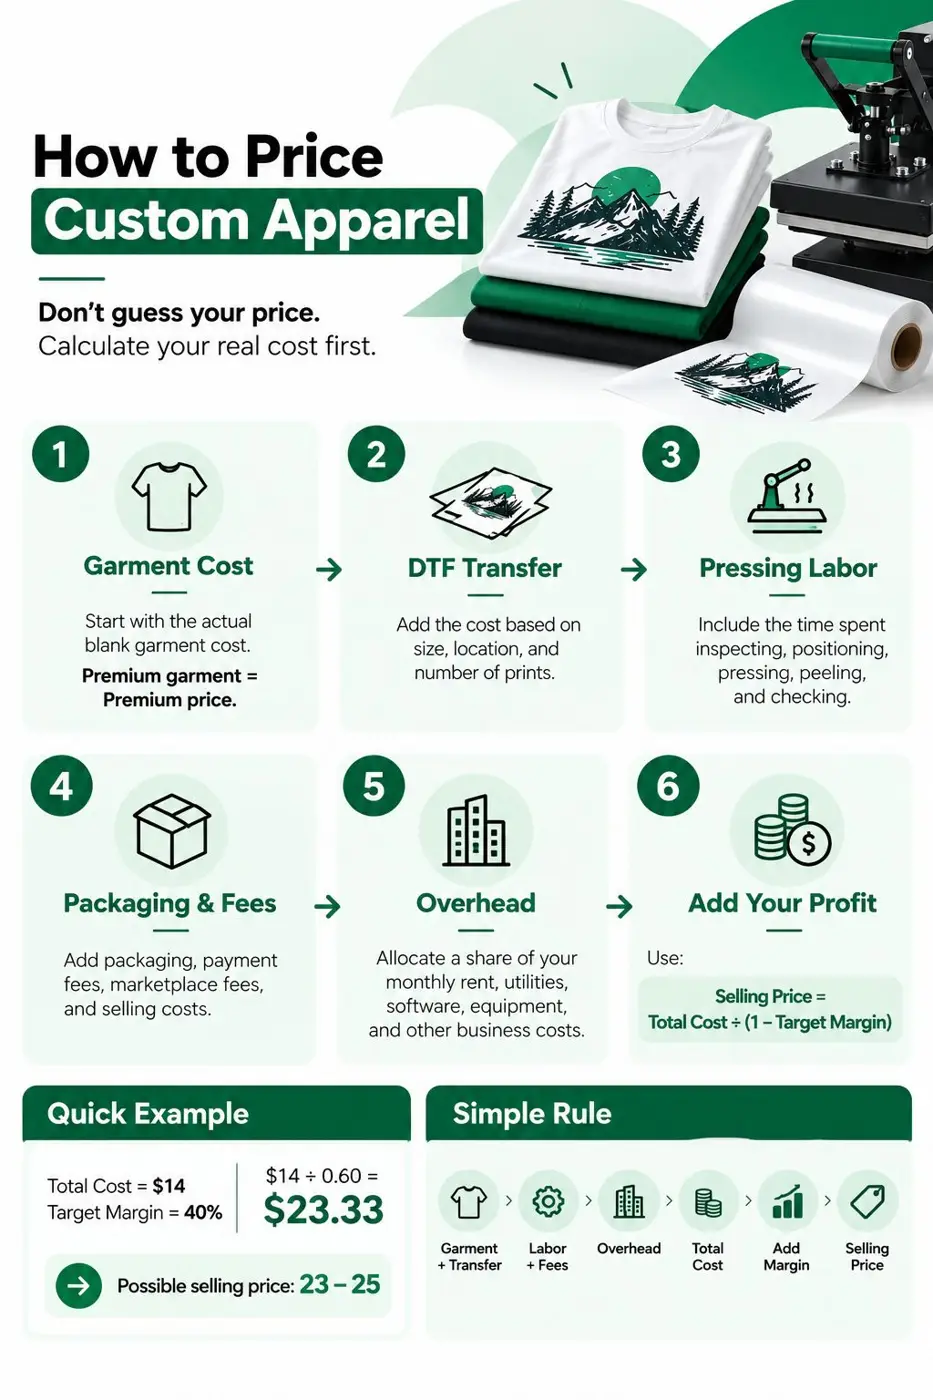
A Simple Pricing Formula
Use this formula for a margin-based retail price:
Selling price = total cost per item ÷ (1 − target profit margin)
For a 40% margin, use 0.40. For a 50% margin, use 0.50. For a 60% margin, use 0.60. The higher the target margin, the higher the selling price must be compared with the total cost.
Illustrative example:
- Blank garment: $6.00
- Bulk DTF transfer: $3.00
- Pressing labor: $2.00
- Packaging and fees: $1.50
- Overhead allocation: $1.50
- Total cost: $14.00
At a 40% target margin, the price is $14 ÷ 0.60, or about $23.33. You might round that to a clean retail price such as $23, $24, or $25 depending on your market and offer. This example is for the method only. Replace each amount with your own costs.
How to Set Bulk and Retail Prices
Retail customers usually expect a higher level of service per item. They may order one shirt, request a proof, need individual packaging, and ask for a specific size. Bulk customers may order many identical items, which can reduce setup and fulfillment time per shirt.
A bulk price can be lower than a retail price without eliminating profit. The key is to calculate the savings created by quantity. If ten identical shirts take less time per shirt than ten different custom designs, the price may reflect that efficiency.
Do not offer a bulk discount simply because the customer asks. Check whether the order reduces your actual cost. A large order with many names, sizes, and placements may require more work than a smaller order with one repeated logo.
|
Order type |
Typical work pattern |
Pricing focus |
Common mistake |
|
Single custom item |
One garment, one design, individual handling. |
Charge for setup and convenience. |
Using a bulk price that ignores setup time. |
|
Small group order |
Several garments, some repeated designs. |
Spread setup across the order. |
Discounting before confirming the design count. |
|
Large repeated order |
Many of the same garment and transfer. |
Reward real production efficiency. |
Assuming every large order is easy. |
|
Mixed custom order |
Different names, sizes, and placements. |
Price each work category clearly. |
Treating all pieces as the same cost. |
Choose a DTF Transfer Profit Margin
Your DTF transfer profit margin should support more than today’s order. It should help cover slow periods, equipment replacement, marketing, customer service, refunds, and future growth. A margin that looks acceptable on paper may be too small if the business has high overhead or irregular sales.
There is no universal margin that fits every apparel business. Your target depends on the product, customer, sales channel, competition, quality, and service level. A simple product with fast production may use a different margin strategy from a highly customized order that takes more communication and labor.
Set a minimum acceptable margin and a preferred margin. The minimum protects you from taking orders that are not worth the work. The preferred margin gives you a starting price that supports the business. For special requests or rush work, add a separate fee instead of quietly reducing your margin.
Keep Profit Separate From Your Pay
If you press shirts yourself, decide how your labor is paid. Your hourly pay is a cost of production. Profit is what remains after that pay and the other costs are covered. Treating all remaining money as profit can make the business look healthier than it is.
Review Your Margin by Product
Track shirts, hoodies, totes, and other products separately. A hoodie may cost more but may support a higher price. A small logo may use less transfer material but still require nearly the same setup time as a large print.
How Bulk DTF Transfers Affect Pricing
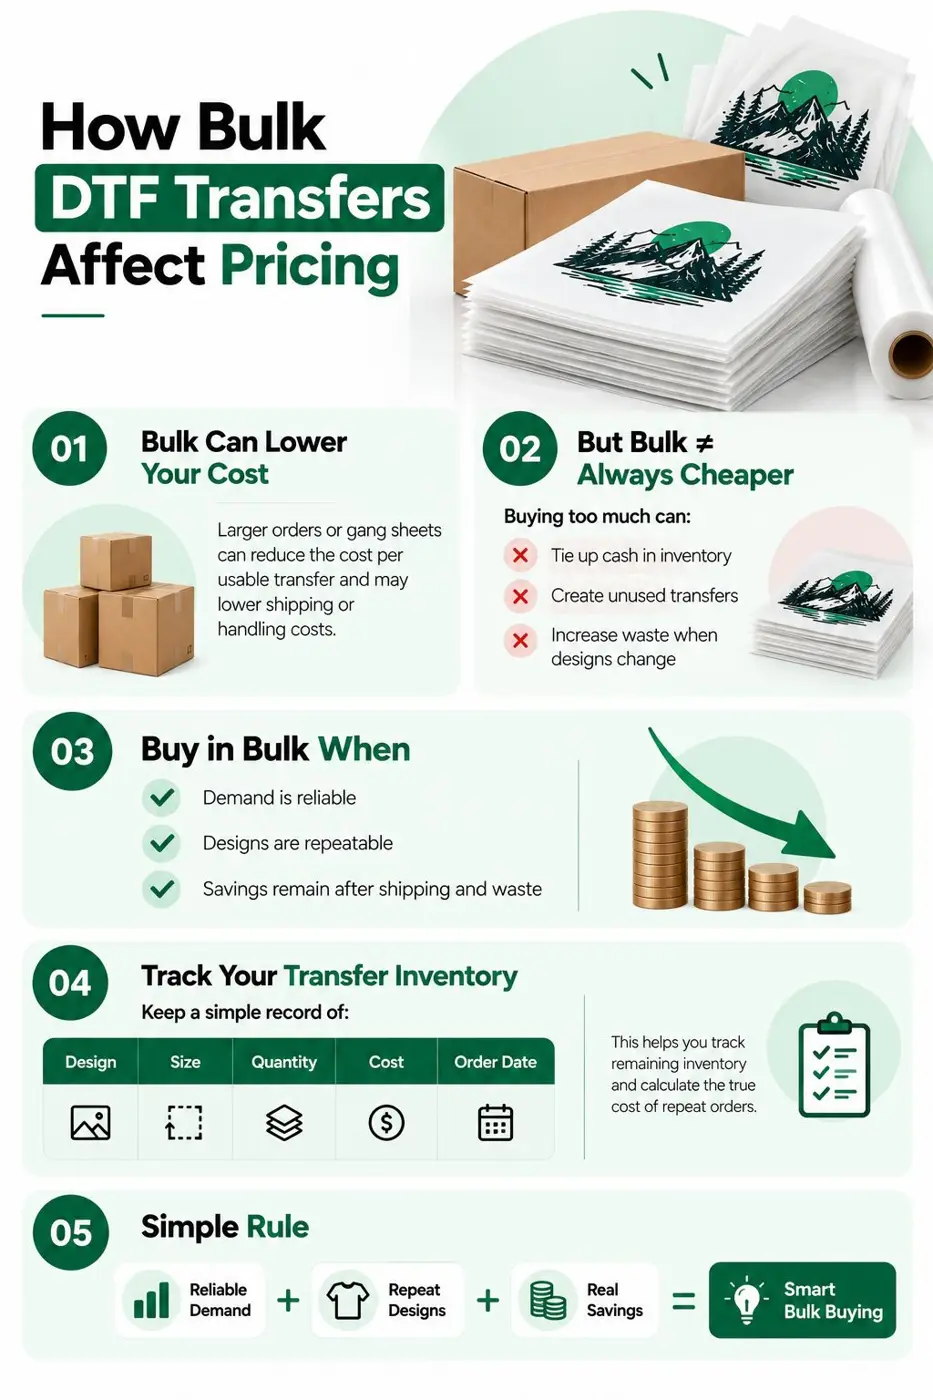
Bulk DTF transfers can improve pricing when they reduce the transfer cost per usable design and fit your actual sales plan. A gang sheet may allow you to combine several designs, while a larger repeat order may lower average shipping or handling costs.
Bulk purchasing does not automatically mean lower total cost. If you order more transfers than you can sell, your money is tied up in inventory. If designs change quickly, unused transfers may become difficult to sell. Buy in bulk when the designs are repeatable, the demand is reliable, or the savings are clear after shipping and waste.
Use a transfer inventory list. Record the design, size, quantity, cost, and date ordered. When a customer requests a repeat, you can use the existing transfer and calculate the remaining cost accurately.
Ready to plan a bulk transfer order? Order Transfers
Add Fees for Special Work
Some orders require more than a standard transfer and press. Custom names, artwork cleanup, multiple placements, rush delivery, special packaging, or individual customer proofs can add time. Make those costs visible instead of absorbing them into every basic shirt price.
An artwork fee may be appropriate when a customer needs a logo rebuilt, a file cleaned, or a design resized. A rush fee may be appropriate when the order needs priority handling or faster shipping. A setup fee can protect your time on a small order with a complex design.
Explain fees clearly before the customer approves the order. Clear pricing builds trust and prevents the customer from comparing a fully customized product with a basic printed shirt.
Check Your Price Against the Market
After calculating your price, compare it with similar products from businesses serving the same customer. Check garment quality, print size, design complexity, turnaround, personalization, packaging, and shipping. A lower price is not always a better offer if it creates a slower or less reliable experience.
If your calculated price is much higher than the market, do not immediately cut the margin. First check whether your costs are too high, your process is too slow, or your offer includes more service than customers value. You may need a simpler product option, a different garment, or a separate price for bulk work.
If your price is much lower than the market, check whether you forgot labor, fees, overhead, or waste. Underpricing can create demand that your business cannot fulfill profitably.
Use a Pricing Worksheet
Create a worksheet with one row for each product and design type. Include blank garment cost, transfer cost, labor minutes, labor cost, packaging, fees, shipping, overhead, total cost, target margin, and final price. Add a notes column for special conditions such as front-and-back printing or personalization.
Review the worksheet monthly or whenever a supplier, garment, shipping cost, or marketplace fee changes. Pricing is not a one-time decision. A small cost increase can reduce your margin across every order if you do not update the price.
Use real order data whenever possible. Compare estimated cost with actual cost, then adjust the worksheet. This creates a pricing system that improves as the business grows.
When to Use Transfer Pricing by Size
A design’s size affects both the transfer cost and the final product price. A small left-chest design may use less material than a large front or back print. If you offer several sizes, create a clear price structure instead of treating every placement as identical.
Need a specific transfer size for your pricing worksheet? View DTF transfers by size
Final Pricing Checklist
Before publishing a price list or sending a quote, confirm the following:
- The blank garment cost is current.
- The transfer cost includes shipping and expected waste.
- Pressing and preparation labor are included.
- Packaging, platform, payment, and shipping fees are included.
- Overhead is allocated using a realistic sales estimate.
- The target margin is calculated as a margin, not confused with markup.
- Bulk discounts are based on real savings in time or cost.
- Special artwork, rush, and personalization work have clear fees.
- The final price fits the product quality and customer market.
Final Recommendation
The best way to price custom apparel is to calculate the complete cost of each product, add a target profit margin, and review the result against your market. Bulk DTF transfers can make the transfer portion of the cost more predictable, especially when you buy repeat designs and use the available sheet space well.
Do not compete only by offering the lowest price. Build a price that pays for quality garments, reliable transfers, your time, customer service, and the future needs of the business. When your pricing is based on complete costs, you can offer discounts with confidence instead of guessing whether an order is profitable.
Ready to price your next bulk order? Request a quote from DTFS.co
Frequently Asked Questions
How do I price DTF shirts?
Add the blank shirt, DTF transfer, pressing labor, packaging, selling fees, shipping allocation, artwork time, and overhead. Then divide the total cost by one minus your target profit margin. Check the result against your market before publishing the price.
What is a good DTF transfer price per shirt?
The correct price depends on transfer size, garment cost, order quantity, labor, shipping, and your target margin. A small left-chest transfer and a large front-and-back order should not automatically have the same price.
How do bulk DTF transfers change pricing?
Bulk transfers may lower the average cost per usable design, but only if you use the pieces you buy. Include shipping, waste, and unused inventory when calculating the real transfer cost.
What is the difference between markup and DTF transfer profit margin?
Markup is added to the cost. Profit margin is the profit divided by the selling price. A 50% markup does not create a 50% margin, so use the correct formula for your goal.
Should I charge separately for custom artwork?
Charge separately when artwork cleanup, redesign, resizing, proofing, or personalization adds meaningful time. A clear artwork or setup fee keeps standard product pricing from carrying the cost of unusually complex work.