


When you apply UV DTF transfers, the quality of the finished product depends just as much on your application technique as it does on the print itself. Even premium transfers can develop bubbles, wrinkles, lifting edges, or weak adhesion if they're applied incorrectly. Whether you're customizing drinkware, packaging, promotional products, or retail displays, following the right process makes all the difference.
This guide walks through every stage of UV DTF transfer application, from surface preparation to final inspection, helping both beginners and commercial decorators achieve smooth, professional-looking results on a wide range of hard surfaces.
Key Takeaways
-
Proper surface preparation prevents most UV DTF application failures.
-
Applying consistent pressure helps eliminate bubbles and wrinkles.
-
Different materials require slightly different application techniques.
-
Temperature, humidity, and cleanliness all affect adhesive performance.
-
Gang sheets improve efficiency when decorating multiple products.
-
A repeatable workflow delivers professional, consistent results every time.
What Are UV DTF Transfers?
Before learning how to apply UV DTF transfers, it's important to understand how they work. Unlike traditional textile DTF, which uses heat to bond designs to fabric, UV DTF is designed specifically for decorating hard, smooth surfaces. The design is printed with UV-cured inks onto a carrier film, paired with a pressure-sensitive adhesive, and transferred directly onto products without the need for heat presses or specialized printing equipment.
This makes custom UV DTF transfers an ideal solution for decorating glass, acrylic, plastic, coated metal, wood, ceramics, and many other rigid materials. Businesses use them to personalize drinkware, product packaging, promotional items, retail displays, and branded merchandise with vibrant, durable graphics that look professionally printed.
For businesses looking for ready-to-use transfers, professionally produced custom DTF transfers offer consistent quality, excellent color accuracy, and reliable adhesion across a wide variety of surfaces.
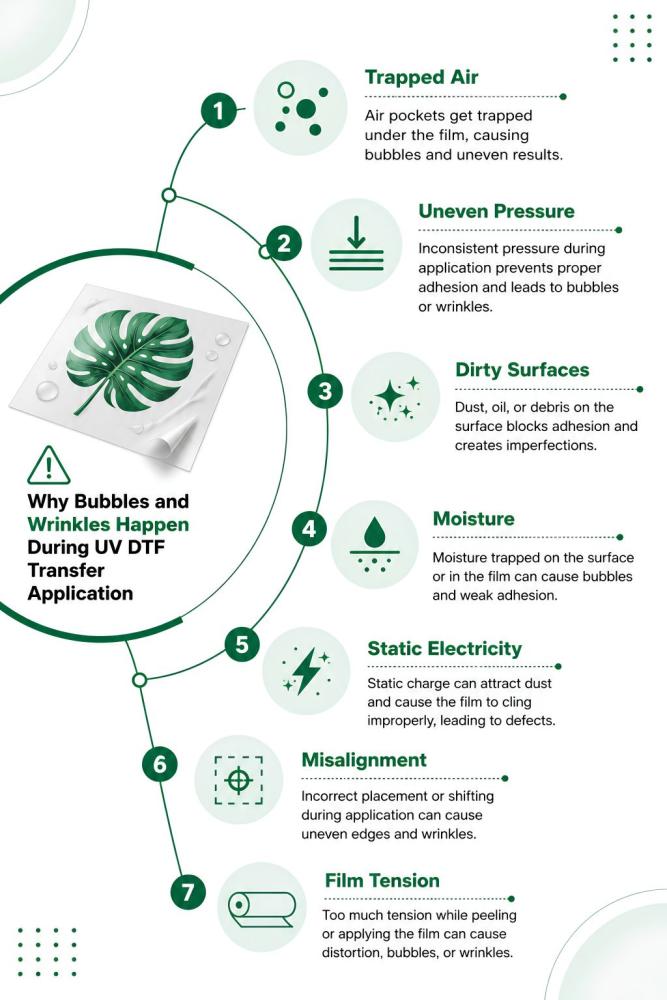
Why Bubbles and Wrinkles Happen During UV DTF Transfer Application
Many application issues aren't caused by poor-quality transfers—they're caused by small mistakes during installation. Understanding why these problems occur makes them much easier to prevent.
Trapped Air
The most common cause of bubbles is trapped air. When the transfer is pressed onto the surface too quickly, pockets of air become sealed beneath the adhesive. These bubbles not only affect appearance but can also weaken long-term adhesion.
Uneven Pressure
Pressure should remain consistent across the entire design. Pressing harder in some areas while leaving others untouched causes certain sections to bond properly while others remain loose, creating wrinkles or lifting edges.
Dirty Surfaces
Dust, fingerprints, oils, waxes, or cleaning residue create tiny barriers between the adhesive and the substrate. Even surfaces that appear clean often contain invisible contaminants that interfere with bonding.
Moisture
Moisture is another hidden problem. Water droplets, humidity, or condensation prevent the adhesive from making full contact with the surface, often leading to peeling several hours or days after application.
Static Electricity
Static attracts microscopic dust particles onto acrylics, plastics, and coated products immediately after cleaning. These particles can become trapped beneath the transfer and create visible imperfections.
Misalignment
Attempting to reposition the transfer after the adhesive has touched the surface almost always introduces wrinkles or distorted graphics. Unlike removable decals, UV DTF adhesives are designed to bond immediately.
Film Tension
Pulling the carrier film too tightly during installation stretches the adhesive layer unevenly. Once released, the tension causes wrinkles to form, particularly on larger graphics or curved products.
By understanding these causes, decorators can focus on prevention instead of correction.
Tools You Need Before You Apply UV DTF Transfers
Professional results begin with the right tools. Fortunately, UV DTF transfer application requires only a handful of inexpensive supplies.
Felt-Edge Squeegee
A felt-edge squeegee distributes pressure evenly without scratching the transfer or delicate substrates. It's one of the most important tools for bubble-free installation.
Isopropyl Alcohol
Alcohol removes grease, fingerprints, silicone residue, and invisible contaminants without leaving behind chemicals that interfere with adhesion.
Microfiber Cloth
Unlike paper towels, microfiber cloths clean surfaces without leaving lint or fibers that become trapped beneath the adhesive.
Masking Tape
Masking tape temporarily holds larger graphics in place while positioning them accurately before removing the backing film.
Tweezers
Tweezers help lift backing films or remove tiny debris without touching the adhesive surface with your fingers.
Gloves
Clean nitrile gloves prevent skin oils from transferring onto freshly cleaned products.
Stable Work Surface
A rigid, level table keeps pressure even across the design during installation.
Bright Lighting
Good lighting makes it much easier to spot trapped dust, air bubbles, or alignment issues before the transfer fully bonds.
Having every tool ready before starting prevents unnecessary interruptions that can compromise the application.
How to Apply UV DTF Transfers Step by Step
Learning how to apply UV DTF transfers consistently is less about speed and more about following a repeatable process.
Step 1: Clean the Surface
Remove dirt, oils, fingerprints, and residue using isopropyl alcohol and a lint-free microfiber cloth. Allow the surface to dry completely before proceeding.
Step 2: Inspect the Surface
Look closely under good lighting for dust, lint, scratches, or moisture. Even tiny particles can become highly visible beneath transparent transfers.
Step 3: Position the Transfer
Without removing the backing, place the transfer exactly where it will be applied. Use masking tape if necessary to hold larger graphics in place while checking alignment.
Step 4: Peel the Backing Slowly
Remove the backing paper carefully without touching the exposed adhesive. Handle only the edges to keep oils away from the bonding surface.
Step 5: Apply One Edge First
Rather than laying the entire design down at once, begin with one edge and slowly work across the graphic.
Step 6: Squeegee from the Center Outward
Using steady, overlapping strokes, press from the middle toward the outer edges. This pushes trapped air outward before it becomes sealed beneath the adhesive.
Step 7: Remove the Carrier Film
Peel the carrier film back slowly at a low angle while watching for lifting edges. If any section begins to lift, stop immediately and apply additional pressure with the squeegee.
Step 8: Perform Final Inspection
Check every edge for complete adhesion and inspect the surface for bubbles or wrinkles before packaging or using the finished product.
Following these UV DTF transfer instructions creates consistent results regardless of whether you're decorating one item or hundreds.
How to Apply UV DTF Transfers on Different Materials
Different substrates respond differently during installation, so small adjustments can significantly improve results.
|
Material |
Difficulty |
Recommended Pressure |
Common Issue |
|
Glass |
Easy |
Moderate |
Fingerprints and trapped dust |
|
Acrylic |
Moderate |
Moderate |
Static attracting dust |
|
Plastic |
Easy |
Firm |
Surface oils reducing adhesion |
|
Metal |
Easy |
Firm |
Condensation on cold surfaces |
|
Powder-Coated Items |
Moderate |
Firm |
Uneven textured finishes |
|
Wood |
Moderate |
Moderate |
Dust from unfinished surfaces |
Glass
Glass provides one of the smoothest application surfaces but also shows every fingerprint and air bubble. Clean thoroughly and inspect under bright light before applying.
Acrylic
Static electricity attracts dust almost immediately after cleaning. Wiping with alcohol just before installation minimizes contamination.
Plastic
Many plastics carry manufacturing oils or release agents that require extra cleaning before decoration.
Metal
Cold metal can collect condensation that weakens adhesion. Allow products to reach room temperature before installation.
Powder-Coated Products
Slight texture may require firmer squeegee pressure to fully activate the adhesive.
Wood
Finished wood performs well, while unfinished wood often contains dust that interferes with bonding. Clean carefully before application.
Bubble-Free UV DTF Application Techniques
Even the highest-quality transfer can look unprofessional if it's applied too quickly or without consistent pressure. A careful technique helps eliminate trapped air and ensures the adhesive bonds evenly to the surface.
Start From the Center
Instead of pressing the entire transfer down at once, anchor the center first and gradually work outward. This method pushes air toward the edges rather than trapping it beneath the adhesive layer.
Apply Slowly
One of the biggest causes of bubbles is rushing the application. Peel the backing paper gradually while applying steady pressure with a felt-edge squeegee. Slowing down gives you better control over alignment and air release.
Work in Small Sections
For larger graphics, divide the transfer mentally into manageable sections rather than trying to install the entire design in one motion. Completing one area before moving to the next improves accuracy and reduces trapped air.
Maintain Consistent Pressure
Apply firm, even pressure throughout the process. Too little pressure may leave areas with poor adhesion, while excessive force can distort the film or create wrinkles.
Keep the Correct Film Angle
Hold the transfer film at a shallow angle as you apply it. A low peel angle helps the adhesive settle smoothly onto the surface instead of folding or trapping pockets of air.
Handle Large Graphics Carefully
Oversized logos and graphics naturally have more opportunities for bubbles to develop. Consider using alignment tape or temporarily securing one edge before beginning. Applying from one side to the other keeps the transfer under better control.
Using these methods consistently results in a more bubble-free UV DTF application, especially when decorating premium promotional products, signage, or retail packaging where appearance directly affects brand perception.
Wrinkle-Free UV DTF Transfers
Wrinkles usually occur when the carrier film stretches or shifts during installation. Fortunately, they're easy to prevent with proper handling.
Avoid Stretching the Film
Never pull aggressively on the carrier sheet. Allow the transfer to lay naturally while guiding it onto the surface with controlled movements.
Peel at a Consistent Angle
After the design has been firmly burnished, remove the carrier film slowly at a low angle. Pulling upward too quickly can lift portions of the transfer or create tension that leads to wrinkles.
Use Extra Care on Oversized Graphics
Large decals require additional patience because even minor movement becomes more noticeable across a larger design. Applying the graphic in controlled stages helps maintain alignment.
Working With Curved Surfaces
Rounded drinkware, bottles, and similar products require gradual application. Rather than pressing the entire transfer down at once, work around the curve slowly while following the contour of the object.
Minimize Film Tension
Allow the adhesive to contact the surface naturally instead of forcing it into place. Keeping the film relaxed prevents distortion and creates cleaner edges.
Following these practices consistently produces wrinkle-free UV DTF transfers that maintain a premium appearance across both flat and gently curved products.
Common UV DTF Application Mistakes
Many application problems are preventable.
Watch for these common mistakes before they affect the finished product:
-
Applying transfers to dirty or dusty surfaces
-
Rushing the installation instead of working gradually
-
Touching the adhesive with bare fingers
-
Poor alignment before the transfer contacts the surface
-
Using excessive pressure that distorts the carrier film
-
Applying too little pressure, leading to weak adhesion
-
Working in environments that are too hot or too cold
-
Using old transfers that have been stored improperly
-
Exposing transfers to excessive humidity before application
-
Skipping a final inspection before removing the carrier film
Even experienced decorators benefit from following a consistent process for every application.
Temperature, Humidity, and Environment Matter
Application conditions can significantly influence adhesion quality, yet they're often overlooked.
Ideal Working Temperature
Most UV DTF transfers perform best in a clean indoor environment between 65°F and 80°F (18°C–27°C). Extremely cold surfaces reduce adhesive performance, while excessive heat can make positioning more difficult.
Humidity Levels
Moderate humidity helps maintain stable application conditions. Excess moisture can interfere with adhesion, particularly on glass or metal surfaces where condensation may develop.
Avoid Cold Products
Products stored in warehouses or delivery vehicles may need time to reach room temperature before application. Applying transfers to cold surfaces can reduce bond strength.
Watch for Condensation
If moisture forms on the product, completely dry it before beginning. Even a thin layer of condensation can prevent proper adhesive contact.
Minimize Dust
Dust particles easily become trapped beneath clear transfer films. Working on a clean surface in a low-dust environment dramatically improves final appearance.
Outdoor Installation
When applying graphics outdoors, avoid direct sunlight, excessive wind, or rapidly changing temperatures whenever possible. Controlled indoor conditions consistently produce better results.
Environmental control is one of the easiest ways to improve application consistency, especially for commercial production.
How to Remove Bubbles After Applying UV DTF Transfers
Even with careful installation, occasional bubbles may appear.
The appropriate fix depends on their size.
Small Bubbles
Tiny air pockets often flatten naturally after additional burnishing. Reapply firm pressure using a felt-edge squeegee, working from the center toward the nearest edge.
Larger Bubbles
For larger trapped air pockets, gently work the air toward the edge with overlapping squeegee strokes. Avoid pressing directly downward, which can spread the bubble rather than remove it.
Pin Method
If a stubborn bubble remains, use a very fine pin to create a tiny escape point near the edge of the bubble. Press the trapped air outward carefully until the surface lies flat.
Re-Burnish
After removing the air, apply even pressure across the entire design again to ensure complete adhesive contact.
Avoid Excessive Heat
Unlike some vinyl applications, UV DTF transfers generally do not require heat for installation. Excessive heat may damage certain substrates or affect adhesive performance.
Know When to Restart
If a transfer becomes heavily wrinkled, contaminated, or significantly misaligned, replacing it usually produces a cleaner result than attempting extensive repairs.
Using Gang Sheets to Improve Production Workflow
Businesses decorating multiple products often improve efficiency by using gang sheet printing. Instead of producing one transfer at a time, multiple graphics are arranged on a single sheet.
This approach offers several operational advantages:
-
Organizes multiple logos in one production run
-
Combines different decal sizes efficiently
-
Simplifies product labeling workflows
-
Reduces material waste
-
Improves production speed
-
Lowers cost per transfer
For growing businesses handling repeat branding projects, gang sheets streamline both production and inventory management. Gang sheet printing helps reduce overall cost and waste.
Bulk UV DTF Transfers for Commercial Production
As production volume increases, ordering transfers in bulk becomes more economical and easier to manage.
Bulk production is especially valuable for:
-
Ongoing branding programs
-
Repeat customer orders
-
Promotional product companies
-
Retail product lines
-
Seasonal marketing campaigns
-
Multi-location businesses
Beyond reducing the cost per transfer, larger production runs also improve consistency because every design is printed under the same production conditions.
Businesses planning long-term branding initiatives often combine bulk production with organized gang sheets for maximum efficiency. Bulk printing helps in minimizing production costs and allows discounts.
Quality Control Checklist
Before considering an application complete, verify each of the following:
-
✔ Surface thoroughly cleaned
-
✔ Transfer positioned accurately
-
✔ No visible bubbles
-
✔ No wrinkles or distortion
-
✔ Adhesive fully bonded
-
✔ Carrier film removed cleanly
-
✔ Colors appear vibrant and accurate
-
✔ Edges fully sealed
-
✔ Overall appearance matches the approved proof
A quick inspection helps catch small issues before products reach customers.
Storage Tips for UV DTF Transfers
Proper storage protects transfer quality and extends usability.
For best results:
-
Store sheets flat to prevent curling.
-
Keep transfers in a cool, dry environment.
-
Avoid prolonged exposure to direct sunlight.
-
Protect from excessive humidity.
-
Keep transfers inside their original protective packaging until use.
-
Avoid stacking heavy objects on top of transfer sheets.
-
Rotate older inventory first to maintain freshness.
Well-stored transfers remain easier to apply and produce more consistent results.
When to Partner With a Professional UV DTF Supplier
Businesses producing branded merchandise at scale often benefit from working with an experienced supplier rather than managing every step internally.
A professional supplier provides:
-
High-quality custom UV DTF transfers
-
Reliable color consistency across repeat orders
-
Optimized gang sheet layouts
-
Bulk ordering support
-
White-label fulfillment options
-
Stable production schedules
-
Dedicated customer support
-
Consistent quality control
Reliable production becomes especially important when serving retail customers, promotional product clients, or large corporate branding programs.
To Wrap Up
Learning how to apply UV DTF transfers correctly is the key to achieving clean, durable, and professional-looking results. Proper surface preparation, steady pressure, careful film handling, and controlled environmental conditions dramatically reduce bubbles and wrinkles while improving long-term adhesion. As production grows, gang sheets, bulk ordering, and consistent quality control make commercial workflows more efficient. Partnering with an experienced supplier for high-quality custom UV DTF transfers helps businesses maintain reliable branding, streamline production, and deliver polished finished products every time.
FAQs
How do you apply UV DTF transfers without bubbles?
Clean the surface thoroughly, apply the transfer slowly, use a felt-edge squeegee from the center outward, and maintain consistent pressure throughout the application.
Why do bubbles appear in UV DTF transfers?
Bubbles usually result from trapped air, dirty surfaces, uneven pressure, rushing the application, or applying transfers in unsuitable environmental conditions.
How do you remove wrinkles from UV DTF transfers?
Avoid stretching the carrier film, peel at a shallow angle, apply gradually, and replace severely wrinkled transfers rather than forcing them flat.
Can UV DTF transfers be applied to curved surfaces?
Yes. Apply them gradually while following the contour of the surface and use consistent pressure to prevent wrinkles and trapped air.
What surfaces work best with UV DTF?
Glass, acrylic, plastic, metal, wood, ceramic, and many coated hard surfaces are ideal for UV DTF applications.
Can UV DTF transfers be repositioned?
Once the adhesive makes full contact, repositioning becomes difficult. Careful alignment before application is essential.
How long should UV DTF transfers cure?
Although they bond immediately, allowing several hours before heavy handling can improve long-term adhesion on certain substrates.
How should UV DTF transfers be stored?
Store them flat in a cool, dry location away from direct sunlight, heat, and excessive humidity.
Are gang sheets better for commercial production?
Yes. Gang sheets reduce material waste, improve workflow efficiency, and lower the cost per transfer when producing multiple graphics.
How do I choose a reliable UV DTF supplier?
Look for consistent print quality, accurate colors, optimized gang sheets, strong adhesive performance, bulk production capability, and dependable customer support.